
Monocular depth mapping in Blender
My 3D pipeline is backed by neural networksA while back, I encountered an interesting trend going on over on TikTok. People were turning their photos into videos with 3D camera movements.
Having created content like this before myself in both Adobe After Effects and Blender, I just assumed I had come across a few people who also knew the process for creating 2.5D content. For anyone who has not seen 2.5D content before, check out the video below by the amazing artist Spencer Miller, who is well know for his 2.5D and 3D concert videos.
Alright. Back to TikTok, here is an example of one of the trend videos I came across. Notice how there is some graphical artifacting near the top and bottom of this video? This made me realize these videos are not your standard 2.5D content, but something else was going on.
@flash_supercars This is a nice Effekt!👍🔥😍#münchen #hypercars #supercars #carspotting #münchencars #flashsupercars #fürdich #fy #carlovers #richlifestyle #bugatti #ferrari #3d #3dzoompro #3dtrend #trend #3dzoomeffect ♬ original sound - 6X Camps 🏆🏆🏆🏆🏆🏆
There was no way so many people could have suddenly learned how to work in 2.5D, all had the required software, and all had the time to painstakingly rotoscope out every depth level of their photo to make it all look good.
Conveniently, it took very little effort to find out that this was all being done by a video editing app called CapCut. I'll spare you the details of researching this CapCut effect to find out how it works, and we will skip right to the technology powering it.
Playing with Neural Networks
From my research, this techololgy (called context-aware inpainting) stems from a paper called 3D Photography Using Context-Aware Layered Depth Inpainting. I wanted to try replicating this effect in Blender, so I loaded up the demo for this paper, tried it out on some images I had lying around, and immediately ran in to issues with incorrect depth estimation results.
After some experimentation, I decided to take a step back from neural-network-powered inpainting and instead started experimenting with the underlying depth estimation research this paper was build on top of.
The Embodied AI Foundation has a paper called Towards Robust Monocular Depth Estimation: Mixing Datasets for Zero-shot Cross-dataset Transfer (much better known as MiDaS). This paper and accompanying Python library describes an implements a high-accuracy method for estimating depth maps from a monocular (single-lense camera) image.
My goal
My goal for this side-project at this point was to create a "zero-thought, one-click" system for bringing monocular images into Blender as full 3D meshes with projection-mapped textures.
This requires three parts:
- A simple system for creating depth maps from images
- An in-DCC interface for image importing in Blender
- Some code to tie everything together and actually create the object
Using Docker with GPU-passthrough for fast depth computation
I happen to have grabbed myself an NVIDIA graphics card with around 4800 CUDA cores last year with the plan of using it for 3D rendering and machine learning experimentation, so my top priority was to make sure I could actually use it for this project.
Luckily, NVIDIA has a solution for doing just this through their project called the NVIDIA Container Toolkit (aka nvidia-docker).
The NVIDIA Container Toolkit allows users to build and run GPU accelerated Docker containers. The toolkit includes a container runtime library and utilities to automatically configure containers to leverage NVIDIA GPUs.
[source: NVIDIA]
Essentially, this toolkit leverages an existing Docker Engine on a host, and provides a bit of a "side channel" for containers with the appropriate client software to access the Host's GPU resources.
Using the toolkit, I threw together a quick project called midas-depth-solve that provides a Docker container to run MiDaS through a little batch-processing wrapper script I wrote. Simply provide a directory full of images in whatever format you'd like along with some configuration flags, and it will spit out each image as a grayscale depth map.
Information on how to use this container stand-alone yourself can be found in the project README.
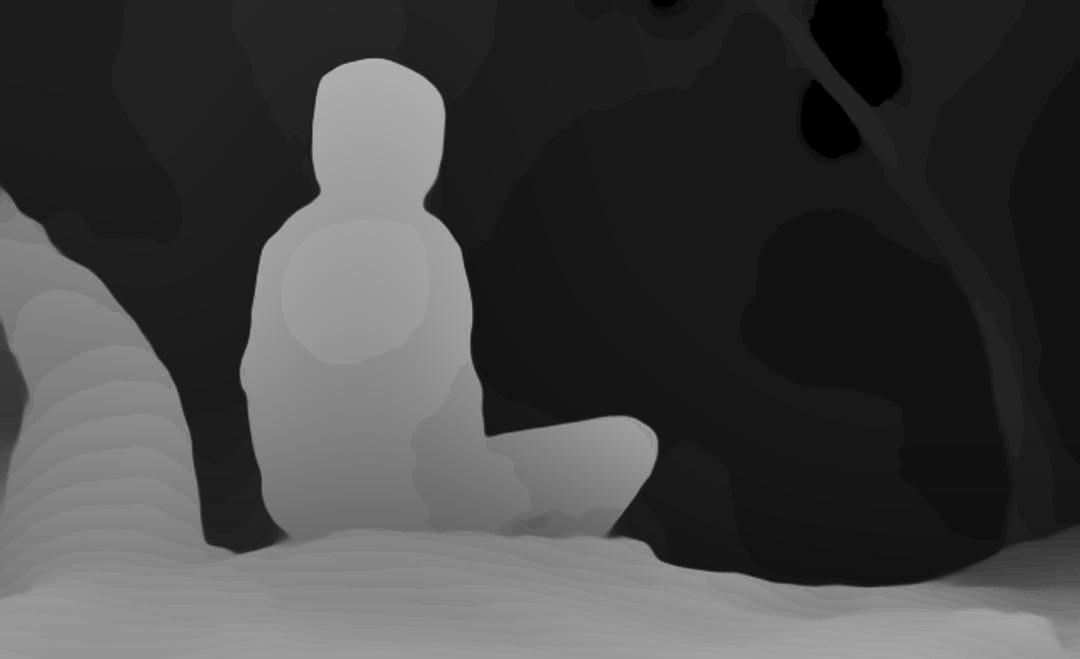
An example of an output from MiDaS is shown below. I have boosted the exposure a lot to make it easier to see the depth levels. Generally, depth maps are low-contrast.
The Blender plugin
I have a personal project called Evan's DCC Scripts where I keep personal plugins for 3D software.
I decided to piggy-back off the pipeline infrastructure I have already set up there for this project. Thus, bringing my MiDaS tool into blender was as simple as creating a new QT GUI, and hooking it up to a custom operator.
For anyone curious, my Blender plugins use QT for maximum interoperability with the rest of my toolset.
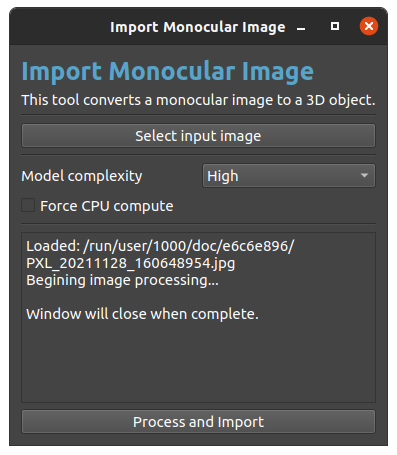
Plugin Dialog: Import Monocular Image
Actually creating textured 3D meshes
The process for converting a depth map and texture to a 3D object is quite simple:
- Create a plane (this can be done through Images As Planes)
- Subdivide the plane (I have been using 128 subdivisions, and it seems to work well)
- Apply a Displace Modifier to the plane, using the depth map as the source texture, and configuring the modifier to work with UV coordinates
The first time I tried this, I encountered a slight issue with depth mapping:
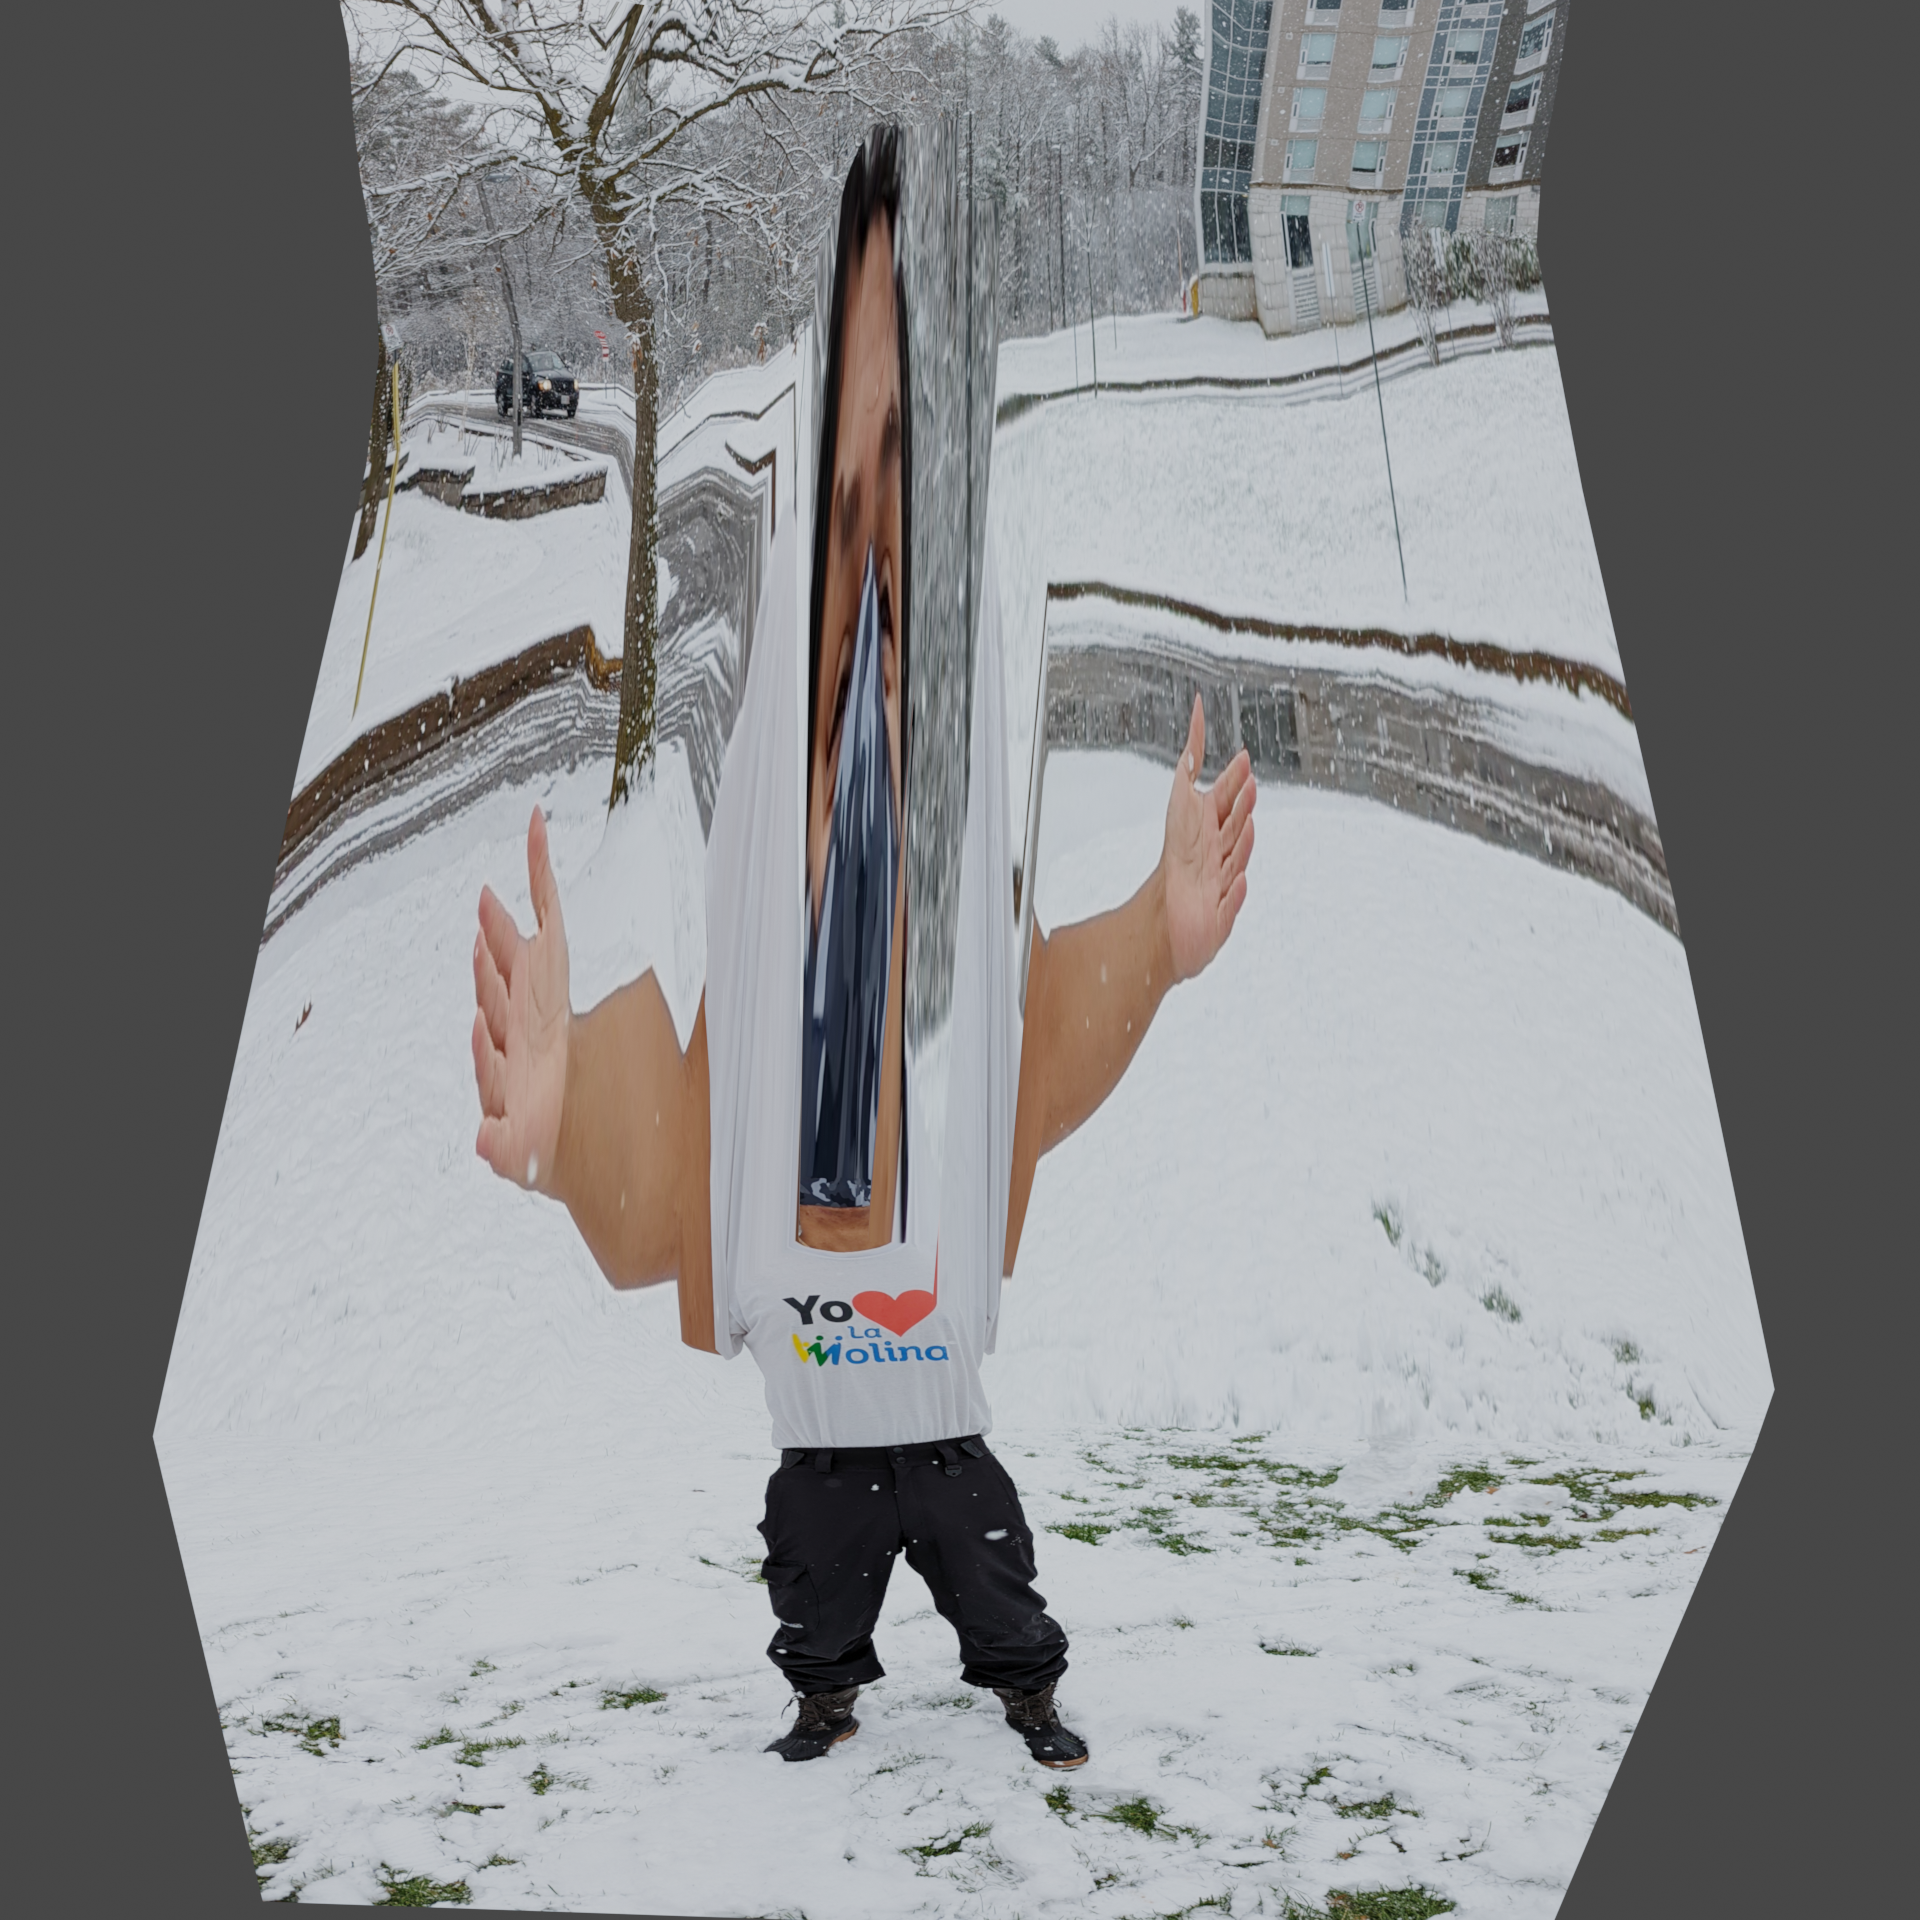
A failed attempt
But then, I quickly figured out how to set up the displacement modifier, and got my expected result:
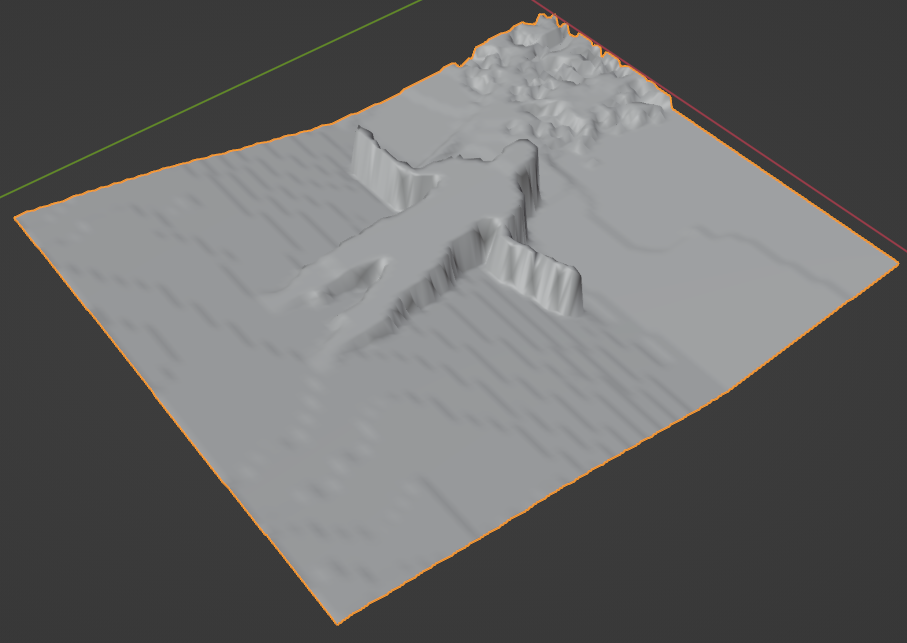
Displaced, untextured |
Textured, viewed from the original camera position |
Conclusion
This whole project was a fun experiment with some tools that are designed for very different applications. I plan to continue refining the quality of the outputs of my plugin. I'll likely look in to reducing un-needed subdivisions using OpenSubdiv in the near future.
If you are interested in experimenting with my depth mapping plugin yourself, feel free to send me an email and I'll help you set it up. Currently, my tools are Linux-exclusive.
And finally, a demo render: